2.2 Users and roles
User List
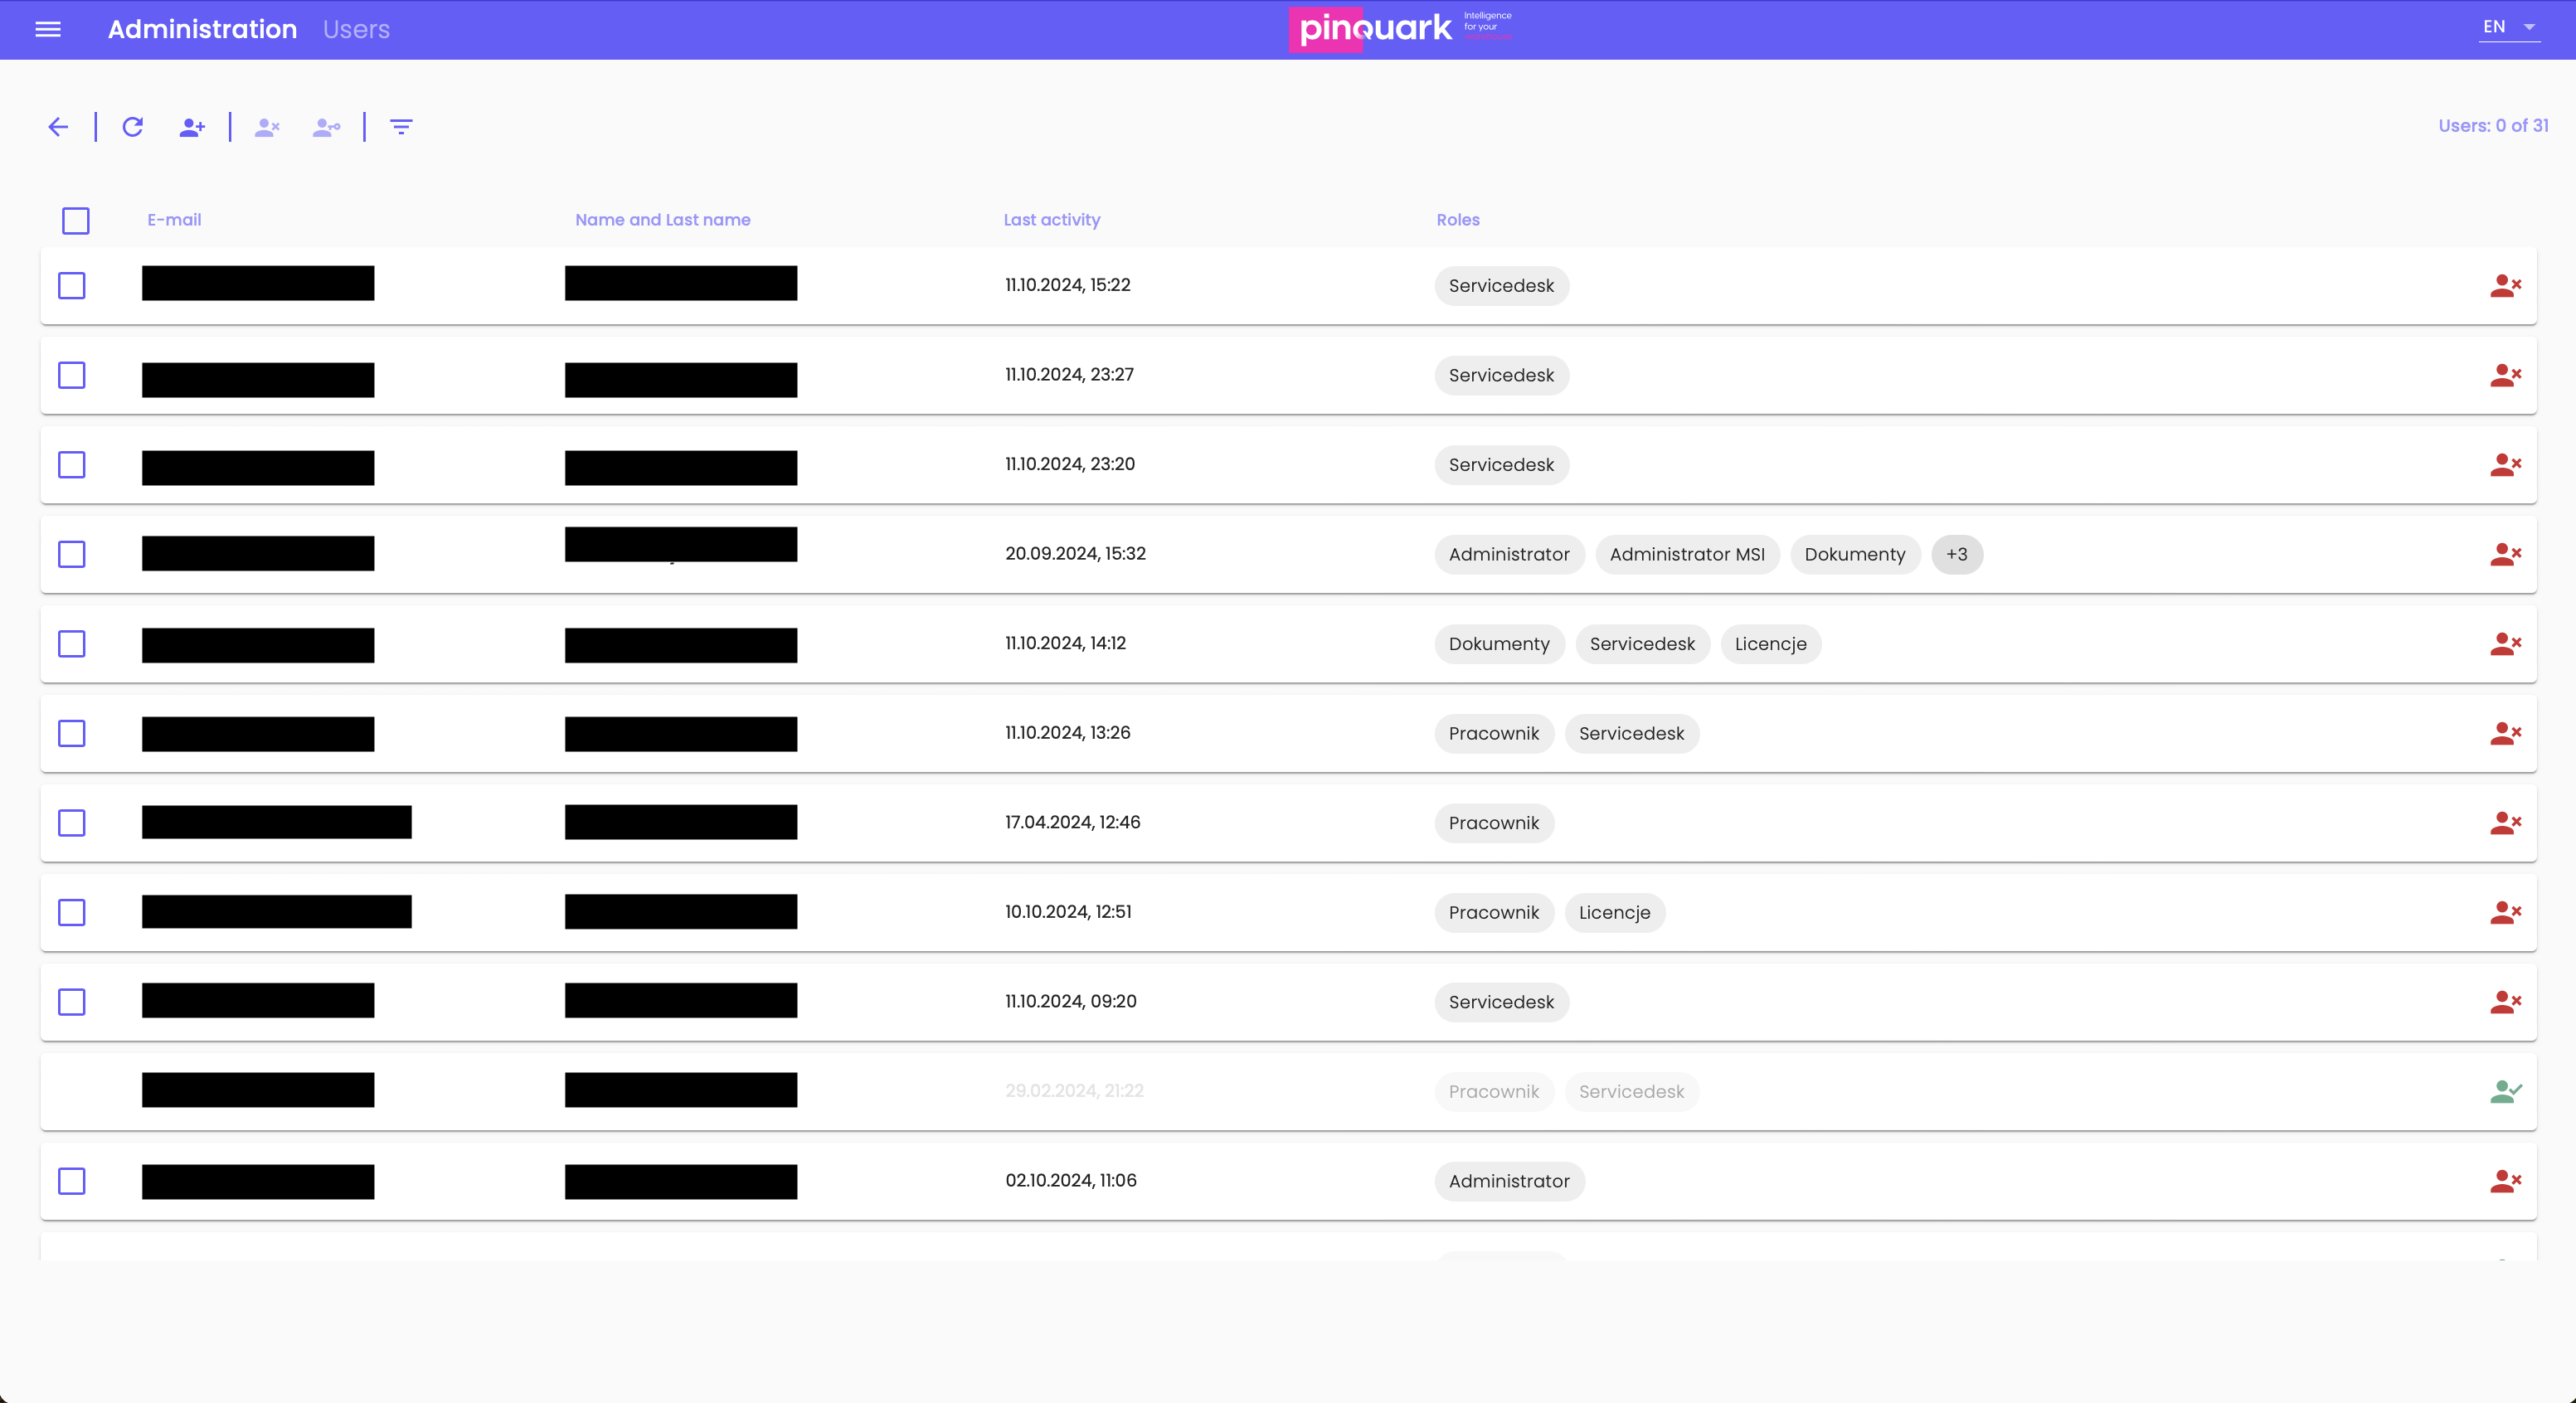
In the Users section, you can view all system users. The list displays users' email addresses, names, and assigned roles. You can also see the user's last activity to monitor when they last used the system.
By clicking the red figure icon on the right side, you can remove a user from the system.
If you want to add a new user or edit an existing one, use the icons at the top of the screen.
Adding a New User
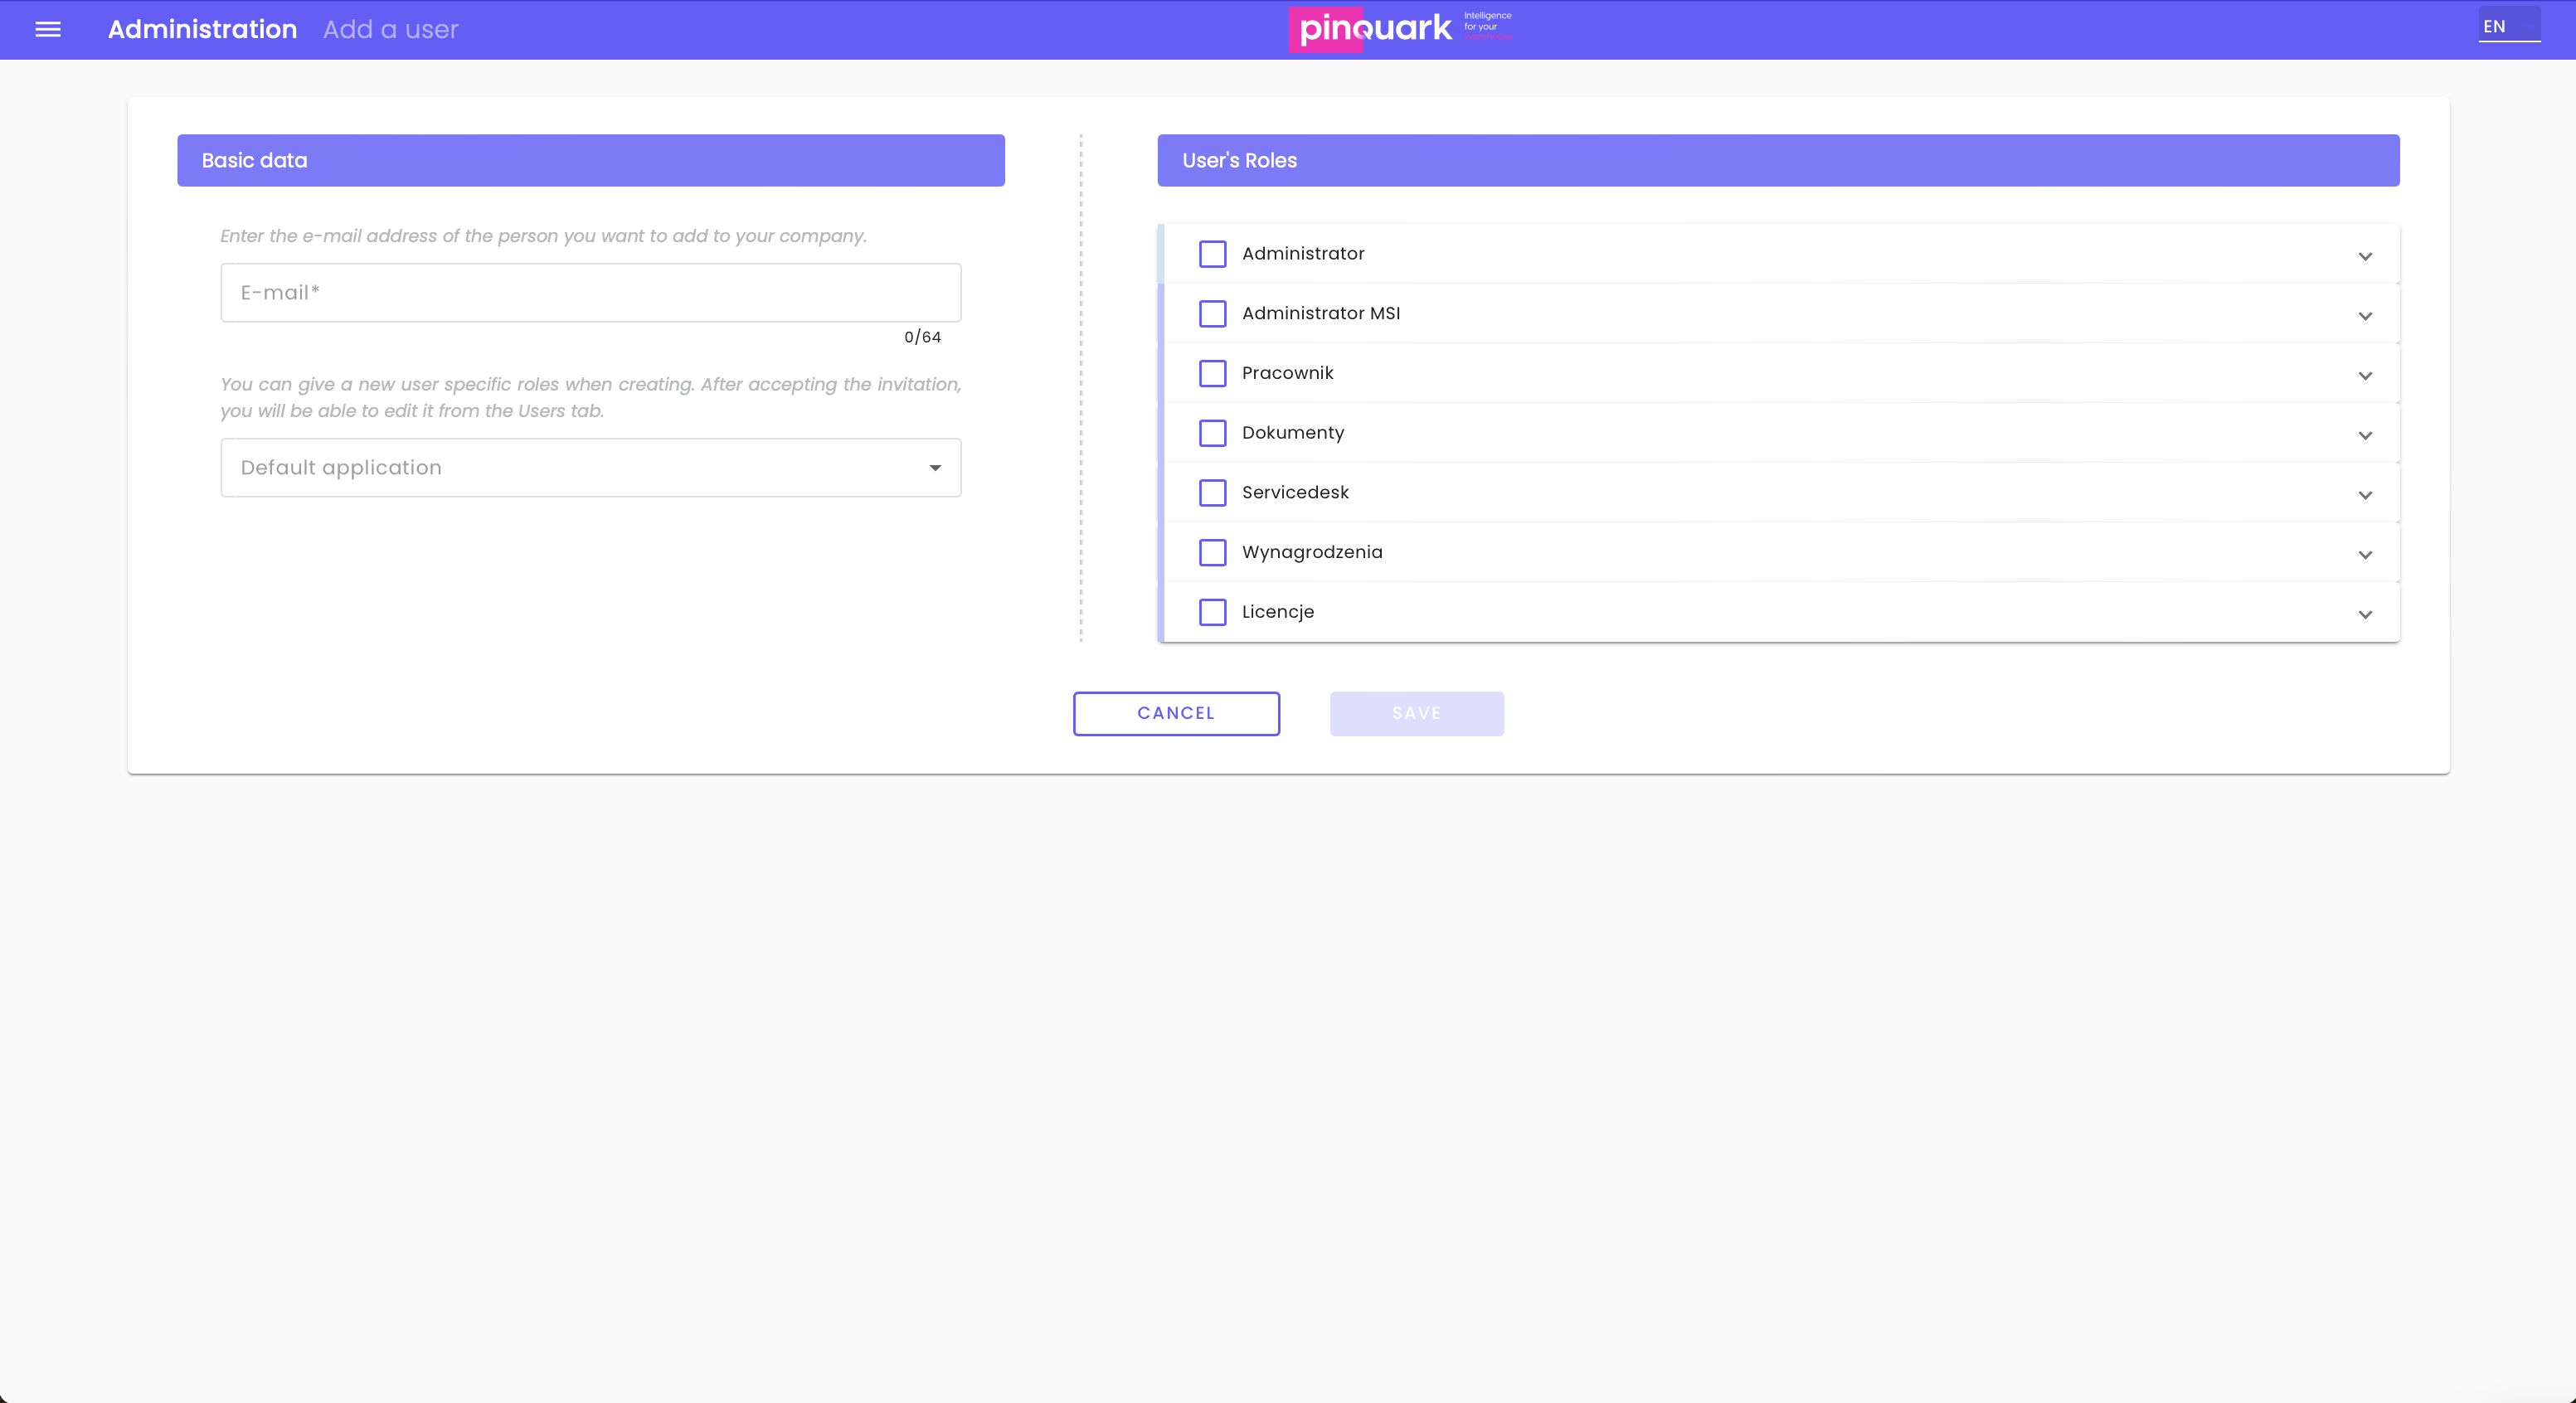
Enter the email address of the new user you want to add to the system.
Select the application that will be launched by default when the new user logs in.
Select the appropriate roles that will be assigned to the new user. Roles determine access to specific system functions.
After entering all the details, click "Save" to add the new user, or "Cancel" to abort the operation.
Editing a User
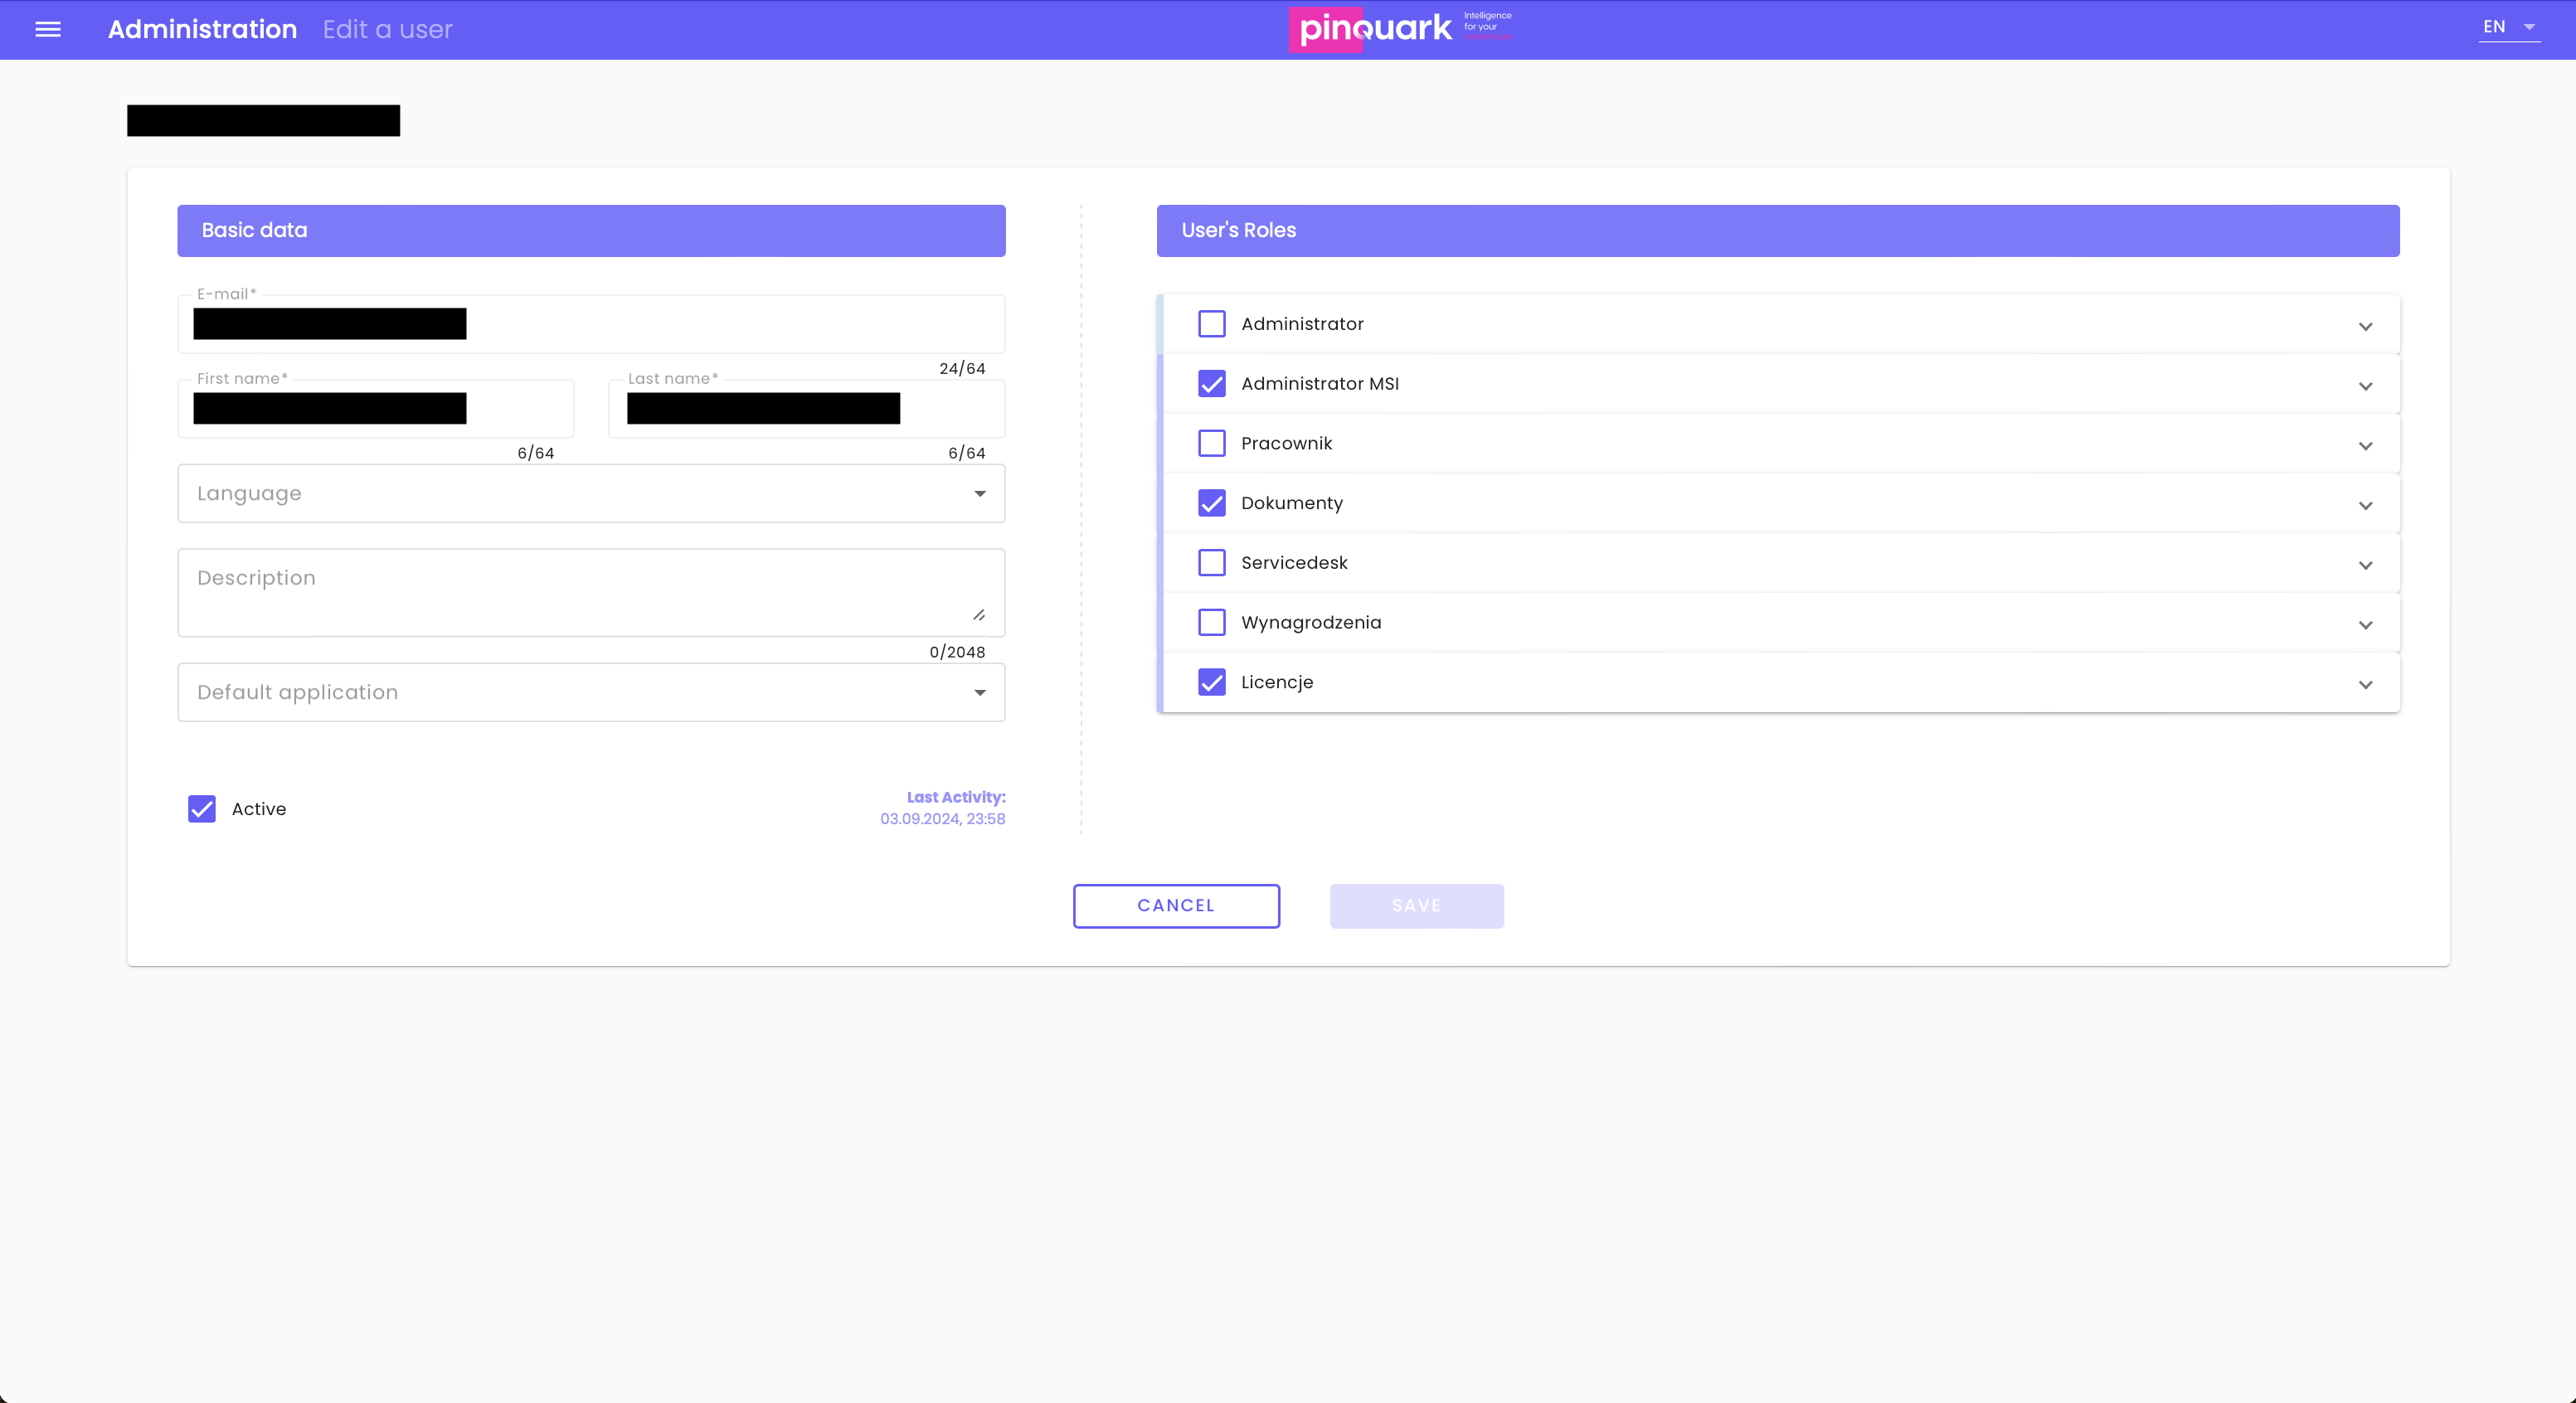
Basic Information:
Email: Edit the user’s email address, which will be used for logging in and system notifications.
First Name and Last Name: Update the user’s first and last name.
Language: Choose the preferred interface language for this user.
Description: Add additional information about this user (e.g., their responsibilities in the company).
Default Application: Select the application that will automatically launch when the user logs in.
Status: Check the "Active" option if the user has active access to the system.
User Roles:
Check the roles that should be assigned to the user. Roles determine the user’s permissions and access within the system (e.g., Administrator, Service, Employee).
Click "Save" to confirm changes, or "Cancel" to discard them.
Reviewing and Editing Roles
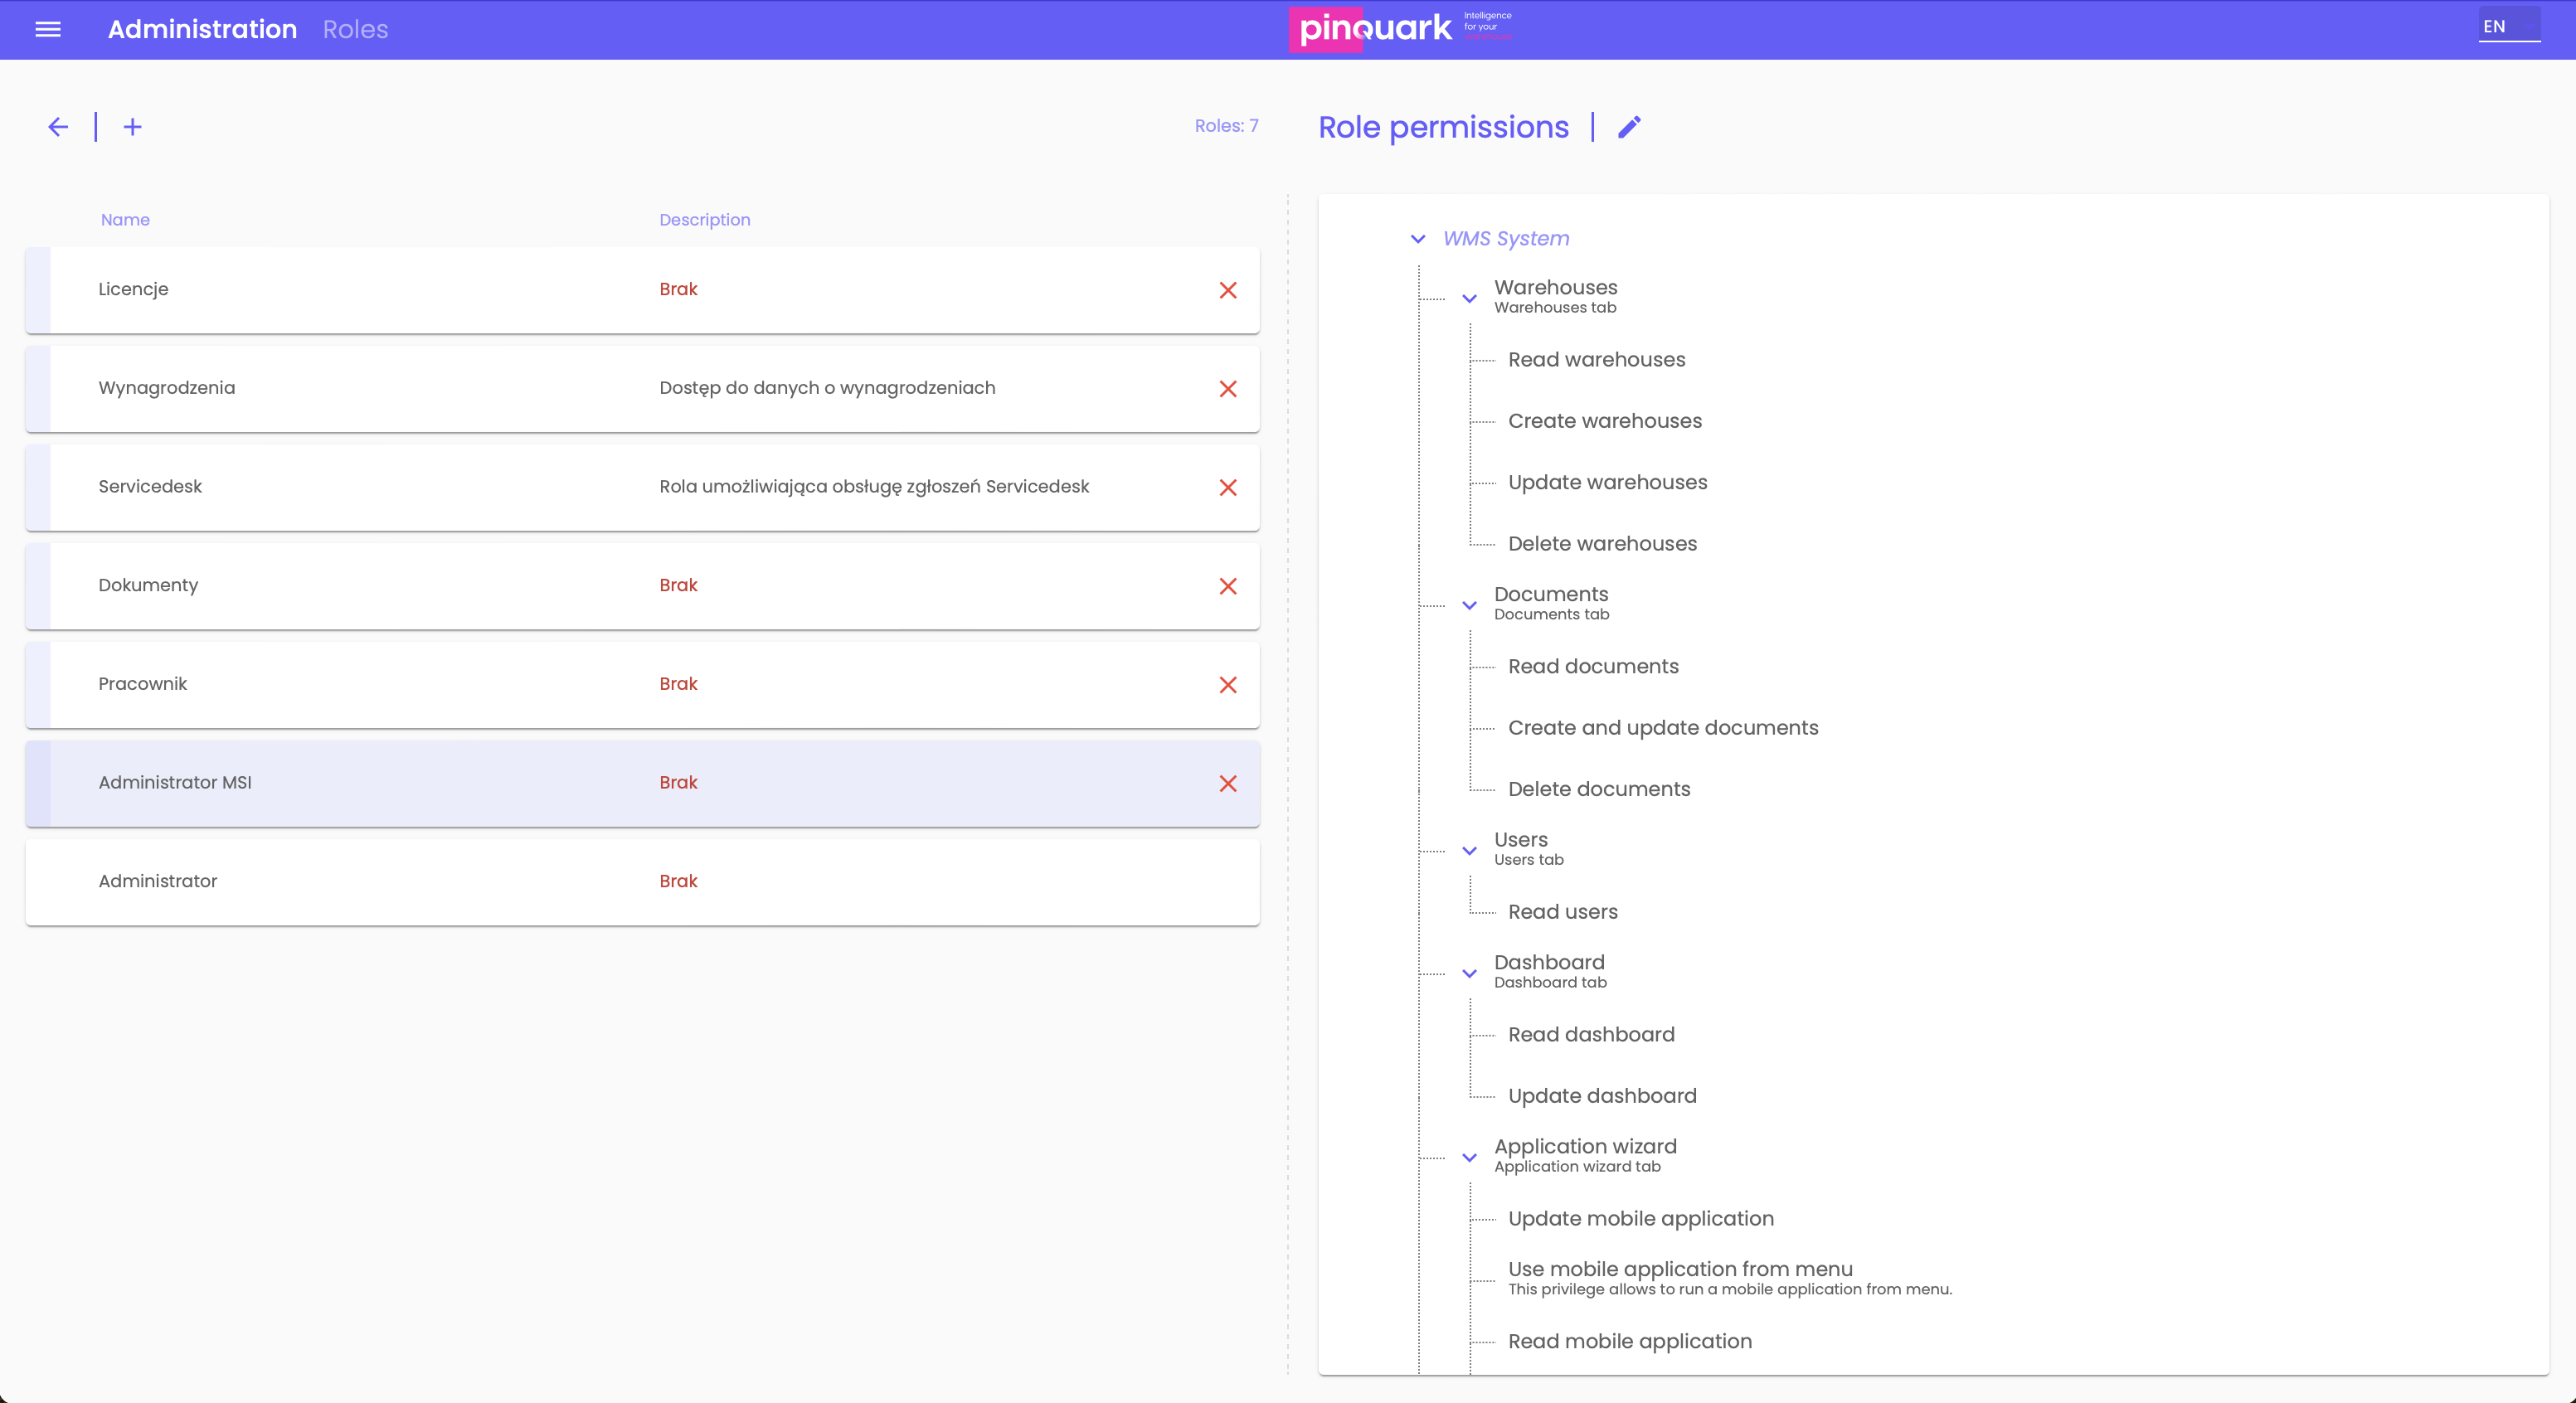
In this section, you can review the existing roles in the system. Each role has assigned permissions that can be viewed and edited.
To edit a role, select it from the list on the left side, then adjust the permissions in the panel on the right side.
You can add or remove permissions for the selected role, such as document reading, adding warehouses, editing the dashboard, etc.
After making changes, click the edit icon (pencil) and save the changes.
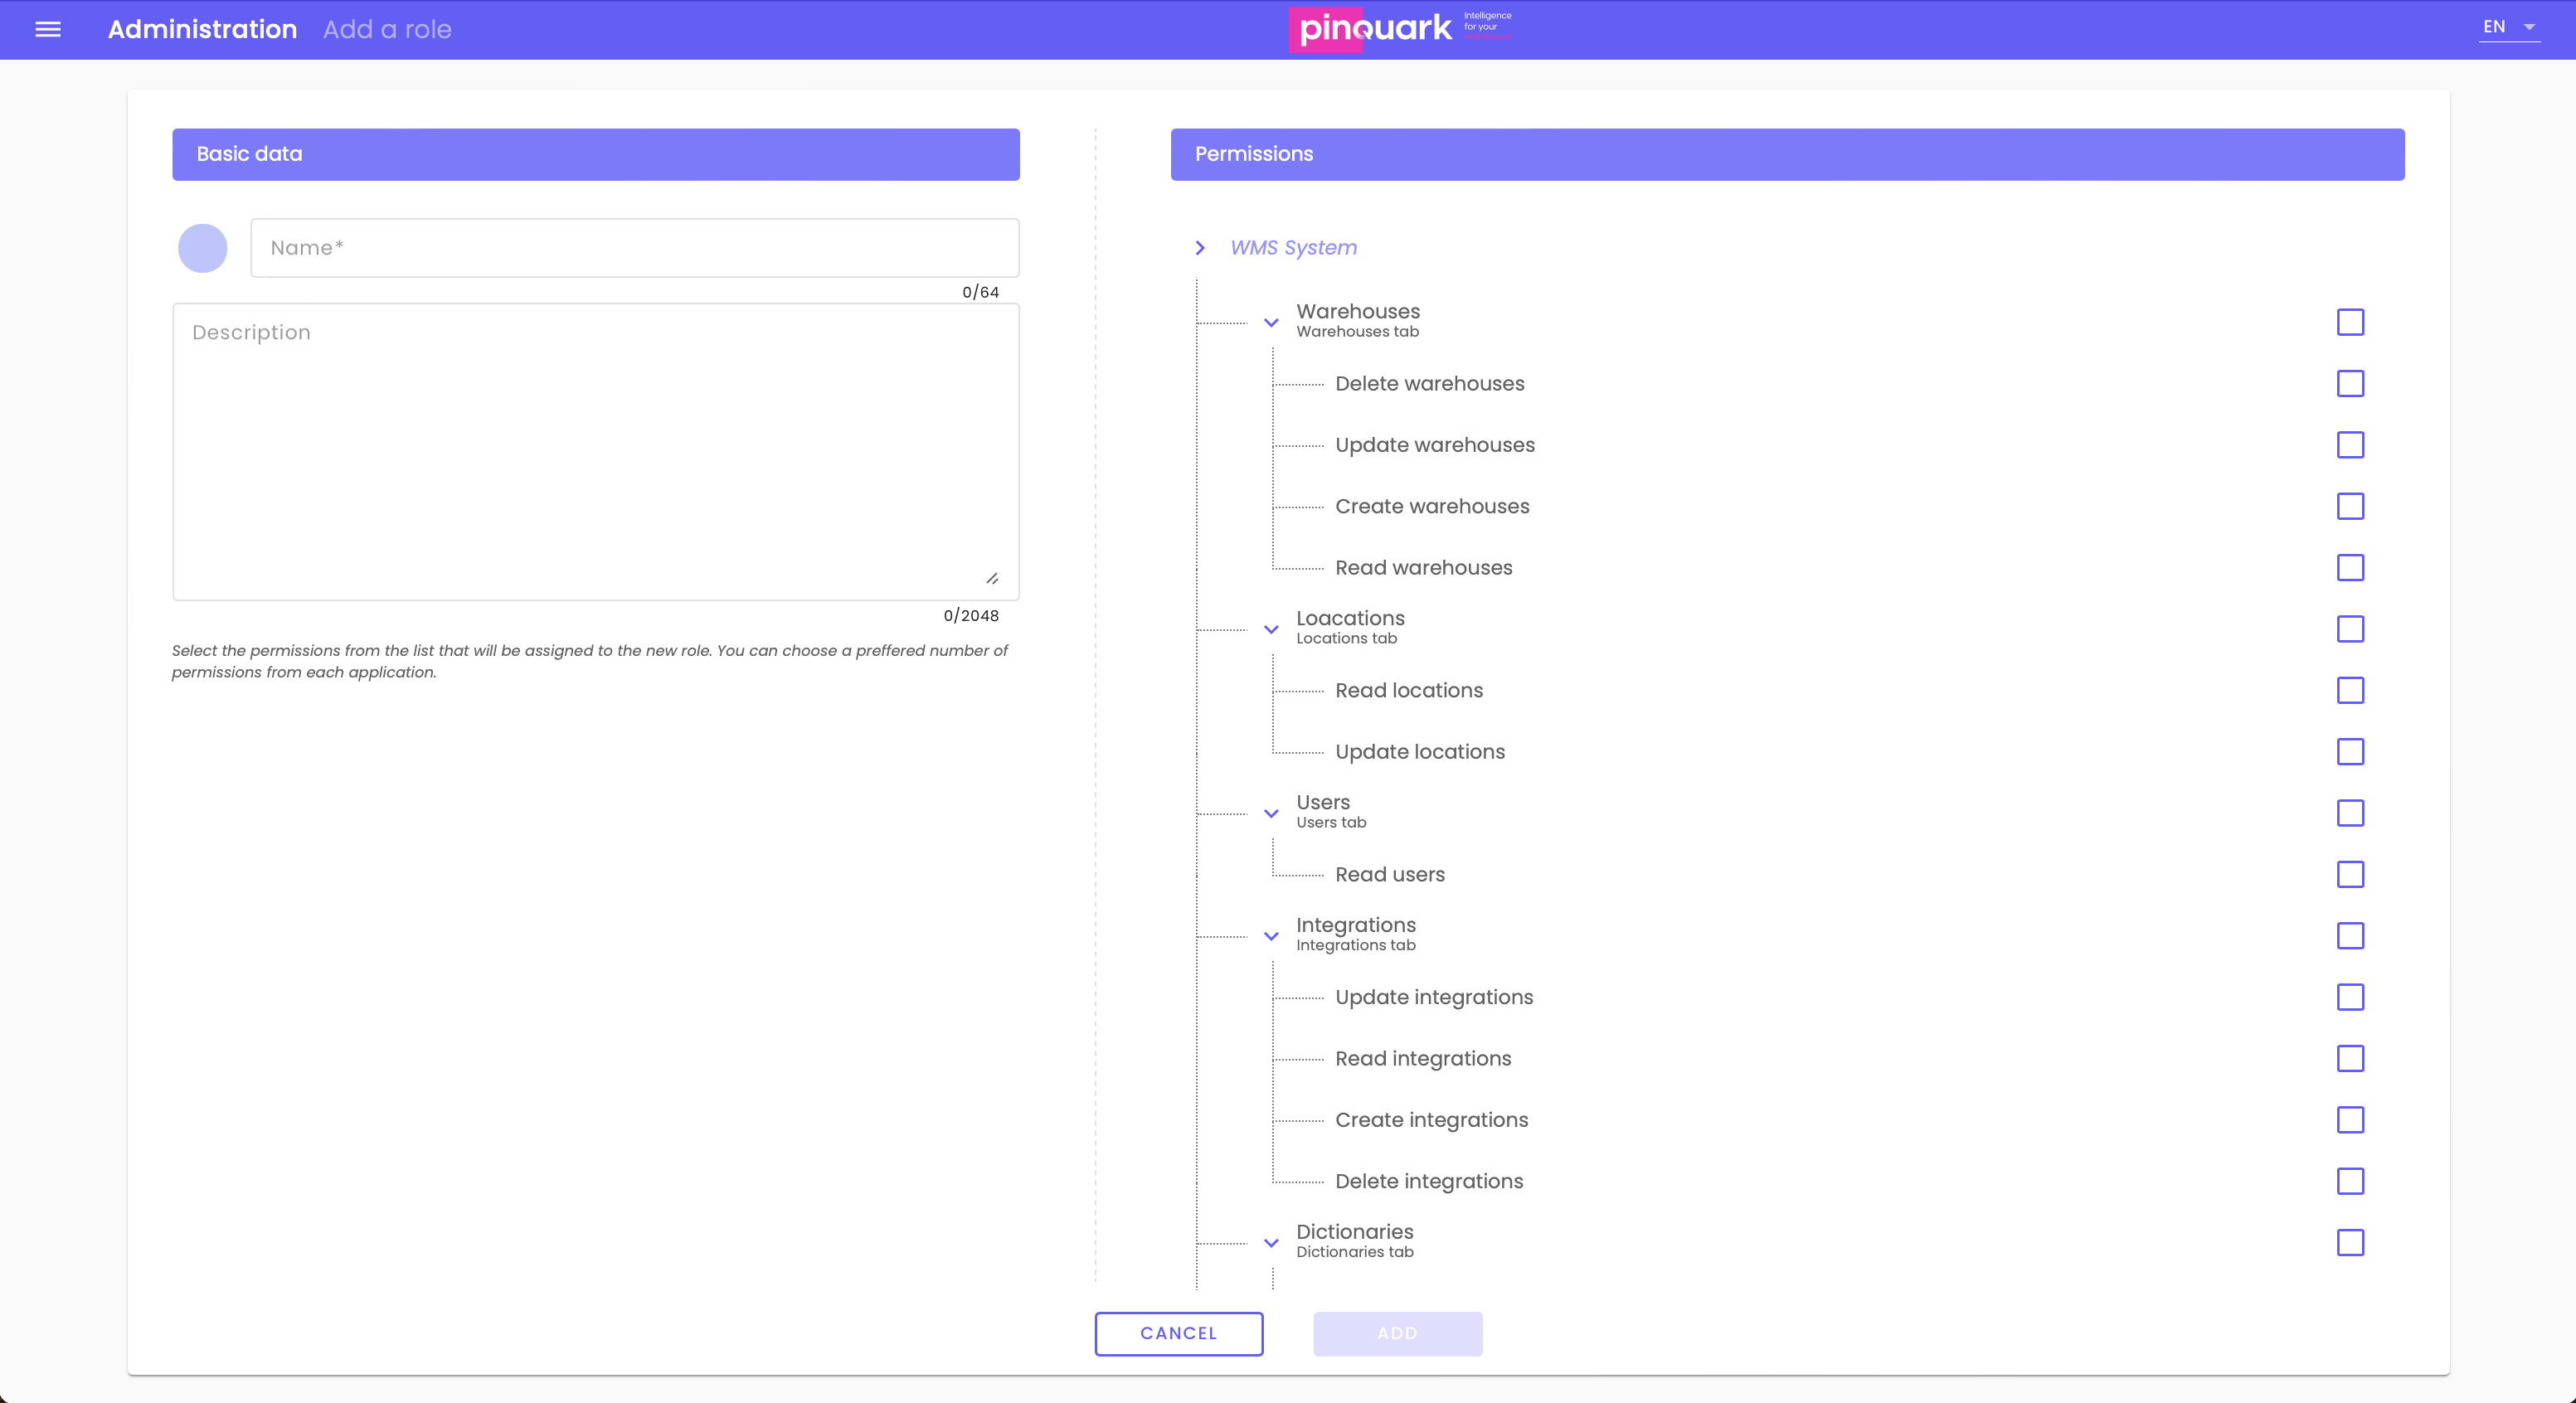
Adding a Role
Name: Enter the name of the new role you want to create, such as "Administrator" or "Employee".
Description: Provide a detailed description of the role to help understand its function.
Permissions: On the list to the right, you can check the permissions that will be assigned to this role. You can select permissions for various WMS system functions, such as managing warehouses, locations, users, integrations, etc.
After selecting the appropriate permissions, click "Add" to confirm the new role, or "Cancel" to exit without saving.
